How to Draw a Dog Step by Step: Unlock Your Inner Artist. Ah, the simple joy of sketching—a blank canvas before you, a pencil in hand, and the thrill of creation waiting at your fingertips. Whether you’re a seasoned artist or someone who can barely draw a stick figure, learning how to draw a dog step by step can elevate your artistic skills. After all, dogs aren’t just man’s best friend; they’re an artist’s best subject, too! So grab that pencil, my friend. We’re about to embark on a paw-some adventure together!
The Importance of Getting the Basics Right
You wouldn’t build a house without laying a proper foundation, right? Well, the same concept applies to drawing. Before we delve into the specifics of how to draw a dog step by step, let’s chat a bit about why mastering the basics matters.
Understanding shapes, proportions, and angles can make a significant difference in how your final drawing turns out. Not to get all science-y, but geometry is your best friend when it comes to art. Trust me, a solid understanding of these elements will pay dividends down the line.
For more insights into the foundations of drawing, you might want to check out Drawing on the Right Side of the Brain by Betty Edwards.
Tools of the Trade: What You’ll Need
Ah yes, even Michelangelo needed his chisels. Here are some basic tools you’ll need for your drawing endeavor:
- Sketchbook or drawing paper: Something with a bit of grit to catch the pencil well.
- Pencils: A variety of soft and hard pencils can add depth to your sketches.
- Eraser: Mistakes happen, so let’s be prepared.
- Sharpener: A dull tool never made a sharp drawing!
If you’re looking for quality art supplies, Blick Art Materials is a reputable store where you can find everything you need.
Starting With Simple Shapes
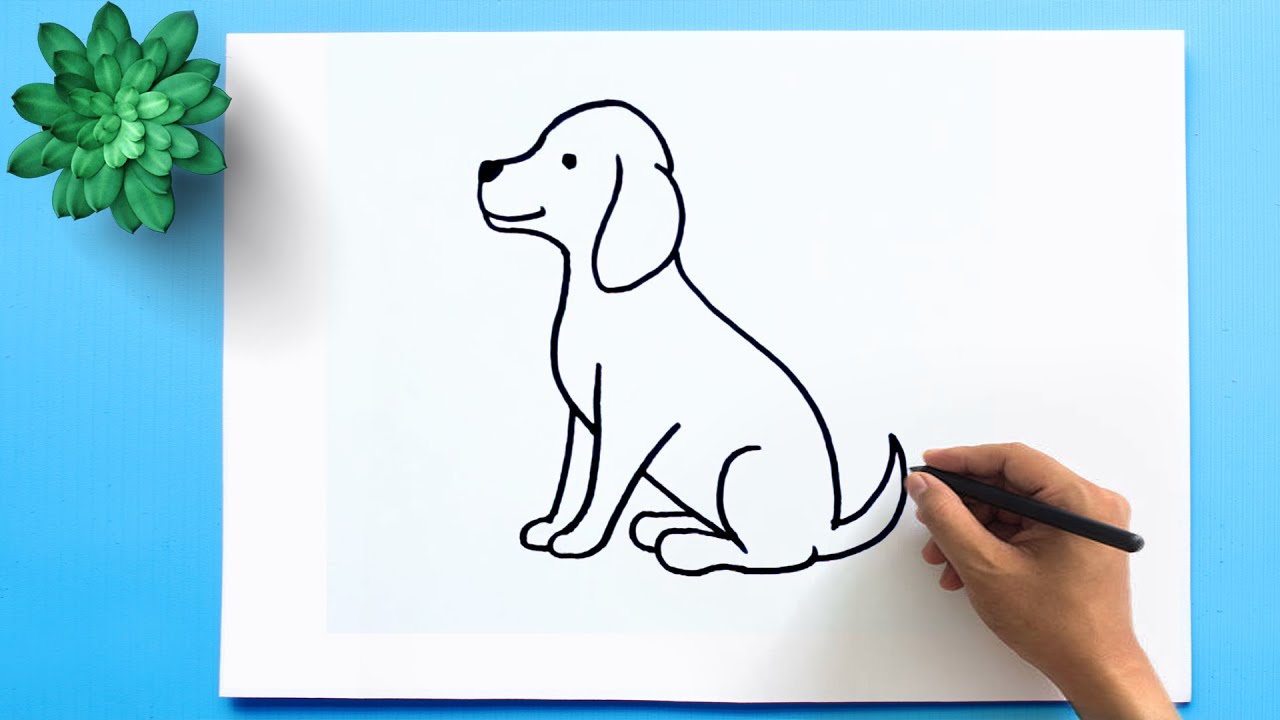
Okay, enough with the prep talk. Let’s dive into how to draw a dog step by step! Your first mission is to break down the complex form of a dog into simpler shapes. Think circles for the head, ovals for the body, and rectangles for the legs. Sounds easy, right?
- Head Circle: Start by drawing a circle for the head.
- Body Ovals: Draw two ovals for the upper and lower parts of the body.
- Leg Rectangles: Sketch four rectangles where the legs will go.
This is your rough draft, your scaffolding. Don’t worry if it doesn’t look like a dog yet. We’re getting there!
Mastering the Art of Proportions
The key to making these basic shapes look like a dog lies in proportions. For instance, the circle that represents the head shouldn’t be bigger than the ovals of the body unless you’re drawing a puppy. Dogs have distinct body-to-head ratios, and getting these right can be a game-changer.
For a deep dive into animal proportions, The Art of Animal Drawing by Ken Hultgren is an excellent resource.
Adding the Facial Features
Ah, the face of a dog! The windows to the pupper soul. Here’s how to draw a dog’s face step by step:
- Eyes: Draw two small circles in the head circle for the eyes. Make sure they are evenly spaced.
- Nose: A smaller circle below and between the eyes serves as the nose.
- Mouth: Draw a line extending from the nose downwards, splitting at the end like an upside-down ‘Y’ to make the mouth.
- Ears: Depending on the breed, add floppy or pointed ears on either side of the head.
For realistic touches, you might want to delve into Drawing Realistic Pets from Photographs by Lee Hammond.
Don’t Forget the Tail!
Oh, the expressive, wagging tail! Make sure to draw it in a way that matches your dog’s emotion. A wagging tail suggests happiness, while a lowered tail might mean your dog is in a relaxed state.
Adding Details and Depth: Fur, Paws, and More!
You’ve got your basic outline, but we’re not done yet. Here’s how to draw a dog’s fur, paws, and add depth to your drawing step by step:
- Fur: Add jagged lines along the body shapes to mimic fur.
- Paws: Draw circles at the end of the leg rectangles, adding ‘toes’ for realism.
- Depth: Use your softer pencils to add shadows and highlights. The more contrast, the more lifelike your drawing will look.
To understand the lighting and shadowing techniques better, James Gurney’s Color and Light: A Guide for the Realist Painter is an invaluable resource.
Final Touches: Breathing Life into Your Drawing
At this point, you’ve already mastered how to draw a dog step by step, but adding final touches can make your art piece gallery-worthy. Consider adding a background, like a park or a room, to give context to your drawing. And hey, why not put a cute collar or even a bandana around your dog’s neck? Get creative!
Unleash Your Creativity: How to Draw a Dog with Confidence and Flair
Drawing has been a cherished form of expression for eons, and few subjects capture our hearts as universally as dogs do. Whether you’re an aspiring artist or a seasoned pro, this guide will walk you through how to draw a dog with easy-to-follow steps and expert tips. So, let’s dive into this engaging and rewarding artistic journey!
The Journey Begins with a Single Pencil Stroke: Why Draw Dogs?
Before we jump into the nitty-gritty of how to draw a dog, let’s talk about why dogs make such captivating subjects for artists. Dogs offer a range of emotions and postures, from playful bounding to calm lounging. Each breed brings unique characteristics, so you’re never short of inspiration. And hey, it’s just plain fun! If you’re intrigued by the idea of capturing the essence of animals in your artwork, “Animal Drawing: Anatomy and Action for Artists” by Charles R. Knight is a must-read.
Tools You’ll Absolutely Love: Setting the Stage for Success
If you’re setting out to make art, let’s make sure you have the right tools to do it. Here’s what you’ll need to draw a dog:
- A sketchbook or quality drawing paper
- Pencils in varying grades
- Erasers
- A pencil sharpener
All set? Great! If you’re still hunting for top-notch art supplies, give Blick Art Materials a visit for a curated selection of everything you might need.
Sketching the Fundamentals: Start Simple
Alright, let’s get to the essence of how to draw a dog. The initial stages don’t have to be complicated. You’ll start by creating some simple shapes that serve as the skeleton of your dog drawing.
- The Head: Draw a circle for the head.
- The Body: Attach an oval to the circle to serve as the dog’s body.
- Limbs and Paws: Add rectangles for limbs and smaller circles for paws.
Don’t sweat the small stuff at this stage. These are merely the building blocks, and perfection is not the goal here.
Mapping Out the Dog’s Face: Where Expressions Come to Life
Here’s where we give our dog drawing some personality! Add facial features to the head circle, keeping proportions in mind:
- Eyes: Draw two smaller circles or ovals for the eyes.
- Nose: Add a nose near the bottom center of the head circle.
- Mouth: Sketch a line for the mouth under the nose.
If you’re wondering how to bring more realism and depth to your pet drawings, “Drawing Realistic Pets from Photographs” by Lee Hammond offers excellent insights.
Dive Deeper: The Art of Details
So, you’ve got your basic outline. Nice work! But if you’re looking to up the ante, this section is where you’ll learn how to add those important details that bring your dog to life.
- Fur: Add jagged lines to represent fur. The type of fur can vary depending on the breed you’re drawing.
- Paws: Refine those small circles into more detailed paws. Don’t forget the toes!
- Tail: Depending on the breed and the dog’s mood, sketch in the tail. Is it wagging, or is it calmly resting?
Interested in learning about the finer aspects of detail work? Drawing Animals in Colored Pencil by Debra Kauffman Yaun is a fantastic resource.
The Final Frontier: Shadows, Highlights, and Backgrounds
After you’ve added the details, the next step in mastering how to draw a dog involves making your artwork pop off the page. Shadows, highlights, and even background elements can make a world of difference.
- Shadows: Use softer pencils to shade in areas that are away from your light source.
- Highlights: Use your eraser or a harder pencil to create lighter areas.
- Background: While optional, adding a simple background can give context to your drawing. Is the dog outside? Inside? Let your imagination decide!
For those who want to take their shading and lighting skills to the next level, “Color and Light: A Guide for the Realist Painter” by James Gurney is a must-read.
Different Breeds, Different Needs: How Breed Affects Your Drawing
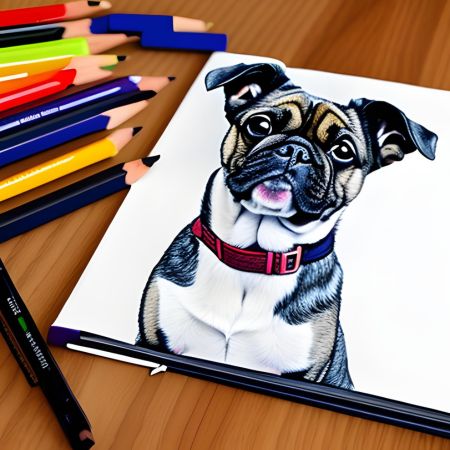
The beauty of knowing how to draw a dog lies in the variety. From the wrinkled face of a Bulldog to the luxurious fur of a Siberian Husky, different breeds offer unique challenges and opportunities for artists.
- Bulldog: If you’re drawing a Bulldog, pay close attention to the wrinkles and the unique shape of the nose and mouth.
- Labrador: Labradors are known for their expressive eyes and shorter fur, offering a different set of challenges and opportunities.
- Siberian Husky: With Huskies, it’s all about the fur and those striking eyes.
Intrigued by the variety in dog breeds and how to capture them in your drawings? The book The Art of Drawing & Painting Horses, Cats, Dogs, and More dives into the intricacies of drawing different animals, including various dog breeds.
Capture the Canine Spirit: How to Draw a Dog Face That Brings Art to Life
Hey there, art enthusiast! Whether you’re a doodler at heart or a dedicated pencil-wielder, you’ve probably been intrigued by the idea of sketching animals. And what better subject to start with than a dog’s face? After all, those endearing eyes and perky ears can melt just about any heart. This comprehensive guide is designed to show you how to draw a dog face that’s not just a doodle, but a work of art. Ready to jump in? Let’s do this!
The Soul in the Eyes: Starting with the Essentials
Let’s kick things off by focusing on the eyes. The eyes are often considered the window to a dog’s soul, and that’s where the connection between the viewer and the art piece starts. To achieve this, grab your pencil and draw two circles or ovals side-by-side on your paper. Remember, the eyes are your starting point for capturing the essence of how to draw a dog face.
- Spacing Matters: Make sure you leave enough space between the eyes to fit another eye. This spacing will depend on the breed you’re aiming for.
- Highlights and Pupils: After sketching the basic shape, add tiny circles inside the eyes for highlights. Then draw a darker circle inside each eye for the pupils.
Ears and More Ears: From Floppy to Pointy
Once you have the eyes down, it’s time to tackle the ears. Ears can be surprisingly expressive, and their shapes can vary widely depending on the breed.
- Floppy Ears: Think Basset Hound or Beagle. Sketch two semi-circles that hang down from the top of the head, framing the face.
- Pointy Ears: German Shepherds and Huskies come to mind. Draw two triangles that stand erect on top of the head.
Want to take your ear-drawing skills up a notch? “The Artist’s Complete Guide to Drawing the Head” by William Maughan is an excellent resource that covers, among other things, how to effectively draw various facial features.
Nose Knows: Giving Your Dog’s Face Character
Alright, now let’s make that dog face sniff-worthy. The nose is a prominent feature that can define the look of any dog face you’re drawing. When learning how to draw a dog face, the nose is an essential element you don’t want to overlook.
- Basic Shape: Usually, the nose shape resembles an upside-down triangle or a rounded rectangle. Position it appropriately between the eyes but lower down on the face.
- Texture and Shine: A dog’s nose isn’t just a flat shape; it’s often shiny and textured. Use shading to indicate this. Lighter spots can signify wetness or shine.
The Wags Are In the Tail, But the Smiles Are In the Mouth
The next crucial component when you’re exploring how to draw a dog face is, of course, the mouth. The mouth can communicate so much about a dog’s mood, whether it’s a happy, open-mouthed grin or a more neutral expression.
- Happy or Neutral: If you’re aiming for a happy look, draw a semi-circle below the nose. For a more neutral or serious look, a simple line will do.
- Tongue or No Tongue: If you opt for an open-mouthed, cheerful expression, consider adding a tongue hanging out.
- It’s All in the Fur: Texture Makes Perfect
Finally, let’s talk fur. The fur on a dog’s face can drastically change the drawing’s overall feel. Shaggy or sleek, each type of fur lends itself to different drawing techniques.
- Shaggy Fur: Use quick, jagged pencil strokes to create a fluffy look.
- Sleek Fur: Use longer, smoother strokes for breeds with shorter or sleek fur.
By now, you’ve got all the tips and techniques you need to learn how to draw a dog face that’s both expressive and realistic. Remember, every dog is different, just like every artist is different. The nuances you bring to your drawing are what will make it uniquely yours.
Unleashing Your Inner Artist: How to Draw a Dog Realistic and Alive
Hey there, future da Vincis and Picassos! Whether you’re a seasoned artist looking to add another feather to your creative cap or a complete newbie starting your artistic journey, you’ve come to the right place. Today, we’re diving into the exciting realm of sketching our four-legged furry friends with paws and poise. Specifically, I’ll guide you through how to draw a dog realistic and full of life. Strap in and sharpen your pencils; this is going to be a fun ride!
Setting Up Your Canvas: The First Paw-prints
The first step in any artistic endeavor is, of course, the setup. You can’t create a masterpiece without the right tools, right?
- Choosing Your Medium: Pencil, charcoal, or digital—choose your medium carefully. While the techniques we discuss will generally apply across mediums, each has its nuances. For realistic drawing, many artists prefer graphite pencils or charcoal for their ability to create detailed textures.
- Quality of Paper: Don’t underestimate the importance of paper quality. Thicker paper that can hold up to erasing and shading is essential when you’re learning how to draw a dog realistic and textured.
You can read more about choosing the right art supplies from this insightful article on Artists Network.
Framework and Proportion: A Bone to Pick
Before you even think about fur and eyes, you need a skeleton—well, a framework, to be exact. Getting the proportions right is critical when your aim is to draw a dog that looks lifelike.
- Basic Shapes: Start by drawing basic shapes to create a skeleton or outline of the dog. Circles and ovals for the head and body, rectangles for limbs. The size and angle of these shapes will vary depending on the breed and pose of the dog.
- Alignment and Angles: Make sure your shapes are aligned. Use guidelines to ensure that the eyes, ears, and other features will be evenly placed.
The Eyes Have It: Windows to the Canine Soul
Eyes are often the most captivating part of any realistic drawing. They hold emotion, expression, and life. When it comes to figuring out how to draw a dog realistic, the eyes are your starting point.
- Shape and Size: Eyes aren’t just circles; they are more like ovals with a slight tilt. The breed of the dog will influence the size and spacing of the eyes.
- Detailing: Once the basic shape is down, work on the iris and pupil. Use your darkest shades here, and don’t forget to leave a small white dot for that lifelike gleam.
Ears: From Wolf-like to Floppy Fun
Ears can be a playground for texture and detail. Whether the dog you’re drawing has upright, alert ears or floppy, playful ones, getting them right is key to a realistic sketch.
- Outline First: Just like with eyes, begin with a basic outline. Is the ear pointy and angular or rounded and floppy?
- Inner Detailing: Ears are not flat. Use varying shades to give them depth and folds. Highlight areas where light would naturally hit and shadow where it wouldn’t.
Texture Is King: Mastering Fur
Ah, fur—the element that can make or break your dog drawing. When learning how to draw a dog realistic, mastering fur is like the final boss battle in a video game.
- Direction Matters: Fur isn’t random. It has a flow and direction. Study your reference photo carefully to understand this flow.
- Layering: One layer of fur won’t do it. Build it up slowly, varying your pencil pressure to create depth and dimension.
Shading and Final Touches: Bringing Your Dog to Life
You’ve tackled the outline, wrestled with fur, and brought emotion to those eyes. Now it’s time to breathe life into your sketch with the final touches.
- Shading: The right shading brings a flat sketch into the 3D realm. Pay close attention to where the light source is coming from in your reference and shade accordingly.
- Details Matter: Don’t forget small details like the wetness of the nose, the shine in the eyes, or the texture of the paw pads.
Unveiling the Personality: Capturing Emotion in Your Dog Drawing
Drawing a realistic dog isn’t just about capturing physical attributes; it’s also about encapsulating the essence and personality of your subject. Dogs have a broad range of emotions, from joyous to contemplative, and your art should reflect that.
Making the Tail Tell a Tale
The tail of a dog is more than just a cute appendage; it’s a communication tool. Whether it’s wagging in joy or hanging low in relaxation, a dog’s tail conveys a myriad of emotions. When working on the tail, take cues from the dog’s overall body language in your reference photo. Is it curving upwards, indicating happiness, or hanging low, signifying contentment or even caution? The angle and movement of the tail can significantly influence the overall emotion conveyed in your drawing.
What’s in a Pose?
Body posture also serves as an essential indicator of a dog’s feelings or intentions. A playful bow suggests an invitation to frolic, while a straight and rigid posture may imply alertness. As you learn how to draw a dog realistic, also pay attention to posture and how it can help you depict the dog’s personality and mood. Little details, like the curve of the back or the position of the legs, can dramatically change the emotion your drawing communicates.
Building Atmosphere: Setting and Background
You can draw the most lifelike dog, but if the setting doesn’t support your subject, something will always feel a bit off. The background isn’t just filler; it adds context and richness to your drawing, enhancing its realism.
Context Matters
The setting you place your dog in can say a lot about its personality or what it’s doing. A dog sprawled out on a couch may indicate comfort and domesticity, whereas one running through a field could symbolize freedom or playfulness. Whether it’s an interior space or an outdoor scene, the background you choose should complement the dog’s position and emotion.
Atmospheric Elements
Weather and lighting are other significant factors to consider when you’re thinking about how to draw a dog realistic. The way sunlight dapples through leaves onto the fur, or how raindrops sit on the coat, can add layers of realism and atmosphere to your artwork. If it’s a sunny day, consider how the light casts shadows on the dog’s body. On cloudy days, you might have more diffused lighting, giving your subject a softer look.
Color Psychology: The Power of Hues
When you’re stepping into the world of colored sketches or digital art, understanding the psychology of color is crucial. Colors can dramatically affect the mood of your artwork.
Warm and Cool Tones
Warmer colors like red, orange, and yellow can imbue your dog drawing with feelings of warmth, enthusiasm, or happiness. On the flip side, cooler tones such as blues and greens can evoke tranquility, calmness, or even sadness. Knowing how to strategically place these colors can help create a mood that aligns with your subject’s emotion.
Balancing Shades
When applying color, it’s crucial to balance your shades. Too much of one color can overwhelm the drawing and alter its mood. If your dog is primarily one color, use varying shades or complementary colors in the background or details to break the monotony.
How to Add Movement: Making Your Drawing Dynamic
A static pose can be charming, but adding a sense of motion to your dog drawing can elevate it from ‘nice’ to ‘wow!’ Even subtle details can make your dog seem like it’s about to jump off the page.
The Illusion of Motion
Sketching a few lines to suggest direction or speed can help convey movement. For example, you might sketch lines that follow the flow of fur when a dog is running, giving a sense of velocity. Similarly, slightly blurred outlines in some areas can mimic motion blur, adding dynamism to your drawing.
Creating Balance in Motion
While emphasizing motion, it’s crucial to maintain balance in your artwork to avoid making it look chaotic. For every action line, consider its counteraction. If a leg is extending forward, another might be pulling back to balance it. The tail or ears might also adjust to maintain equilibrium. These finer points can make all the difference in how natural the movement appears in your drawing.
From Sketch to Masterpiece: The Journey of Practice
One thing every budding artist should know is that mastery takes time and patience. You might not nail how to draw a dog realistic on your first try, but that’s okay!
The Power of Practice
As the old saying goes, “practice makes perfect.” Your first few attempts might look more like abstract art than a lifelike dog, but don’t get discouraged. Every line you draw brings you one step closer to creating that masterpiece. Keep honing your skills, experimenting with techniques, and learning from your mistakes.
Critique and Improve
Don’t shy away from constructive criticism. Share your work with friends, family, or online art communities. Listen to what they have to say and take their feedback to heart. You can also revisit your own work with a critical eye. Put your drawing away for a day or two, and then look at it afresh; you’ll be surprised how many areas of improvement become apparent.
The Role of Texture: Creating a Fur-realistic Experience
Ah, the fur! One of the defining features of our canine friends is their fur, which varies in texture, length, and color. When you’re figuring out how to draw a dog realistically, mastering fur can significantly elevate your artwork.
- The fur isn’t just a bunch of lines; it has direction and flow.
- Consider the length and style of the fur when you’re drawing. Is it curly, wavy, or straight?
- Add layers to the fur, starting with a base layer and gradually building up to create depth.
- A common mistake is to make fur look too uniform. Break up the monotony by adding darker or lighter patches.
- Take note of how light interacts with fur. It creates highlights and shadows that can make or break your realism.
Remember, the texture of the fur can also help communicate the dog’s mood or actions. For example, fur might stand up on the neck if the dog is agitated or lay flat when relaxed.
Mastering the Details: Eyes, Nose, and Ears
When you’re drawing anything realistically, it’s often the little details that make all the difference. The eyes, for example, are windows to the soul, even for our furry companions.
- Eyes are more than just circles; they have depth, reflection, and even tiny patterns.
- The nose, too, has intricate details. It’s not just a black blob; think about the texture and how light reflects off it.
- Don’t forget the ears. Depending on the breed, they can be pointy, floppy, or somewhere in between.
- Adding tiny hair details within the ears can make them appear more lifelike.
- Consider how these features interact. For instance, the eyes and ears might perk up in unison when a dog is alert.
The Subtleties of Shading: Creating a 3D Effect
To make your drawing appear three-dimensional, you need to master the art of shading. This doesn’t mean randomly darkening areas; it means understanding how light interacts with your subject.
- Observe where the light source is coming from and how it casts shadows.
- Utilize various shading techniques like hatching, cross-hatching, or blending to achieve different effects.
- Highlight areas that light directly hits, and shade the areas where light is obstructed.
- Remember that different textures reflect light differently. For example, fur will disperse light, creating a softer shadow.
- When you’re adding shades, do it gradually. Build up the layers to avoid making irreversible mistakes.
Fine-Tuning with Fineliners and Pencils
Choosing the right tools can significantly impact the quality of your artwork. A common go-to is a pencil, but you shouldn’t underestimate the power of a good fineliner.
- Pencils are great for sketching and shading but may lack the precision that fineliners offer for intricate details.
- Fineliners can add crisp lines that define eyes, nose, and individual strands of fur.
- However, you must be cautious with fineliners as the ink is permanent.
- Layering different pencil hardness can give you more control over shading and depth.
- Experiment with different tools to find what works best for your style and the specific attributes of the dog you’re drawing.
Combining Traditional and Digital Techniques
In the modern world, you’re not limited to paper and pencil. Digital art tools offer a plethora of options to make your drawing as realistic as possible.
- Programs like Adobe Photoshop or Procreate offer various brush options that can mimic real-life drawing tools.
- You can layer digital art effortlessly, which is a big plus when you’re trying to create a complex texture like fur.
- Digital platforms also allow for easy error correction. If something doesn’t look right, you can simply undo it.
- One of the advantages of digital drawing is the ability to zoom in for those intricate details.
- However, remember that the fundamental principles of how to draw a dog realistic remain the same, whether you’re going digital or sticking with traditional methods.
Achieving Symmetry: Because Dogs Aren’t Lopsided
Getting the proportions right is fundamental when it comes to realism, and that includes achieving symmetry where needed.
- Focus on the face, as it’s often the most symmetrical part of a dog.
- Use guide lines to ensure that the eyes, nose, and other features line up correctly.
- However, perfect symmetry might not always be ideal; slight imperfections can add character.
- Look at your drawing from different angles to check for symmetry. Sometimes flipping your drawing can reveal imbalances you hadn’t noticed.
- Remember, symmetry is vital, but it shouldn’t come at the expense of naturalness.
Reflections and Light Sources: The Shine in the Eyes
It might sound like a tiny detail, but adding a small reflection or “shine” in the eyes can bring your dog drawing to life.
- Observe where the light source in your setting is coming from. This will guide you on where to place the reflection in the eyes.
- A small white circle or even a dash can make a world of difference in making eyes look moist and realistic.
- This technique can also be applied to the nose and sometimes even the fur, where light may catch and create a gleam.
- Keep in mind that too much shine can make your dog look artificial or exaggerated.
- Adding reflections is one of the final touches you should add to your drawing; it acts like a cherry on top of a sundae.
Capturing the Canine Spirit: Emotional Resonance
Remember, drawing is not just about what you see; it’s also about what you feel. Capturing the spirit of the dog you’re drawing will add emotional depth to your artwork.
- Think about the dog’s personality traits and how you can incorporate them.
- For instance, a lively dog might be best represented with a playful posture and vibrant eyes.
- A more serene or older dog might have a more relaxed stance and calm, wise eyes.
- The dog’s spirit can also be reflected through the setting you choose, like an adventurous dog on a mountain trail or a homely dog curled up on a rug.
- Let your emotional connection to the subject guide your choices as you draw.
Correcting Mistakes: Learning from Errors
Nobody gets it right the first time, and mistakes are a part of the artistic process. The key is to learn from them.
- Don’t be afraid to use an eraser. Sometimes you have to take a step back to move two steps forward.
- If something looks off, don’t ignore it, hoping it will fix itself or go unnoticed. Address it.
- Be your own toughest critic. Scrutinize your work and be willing to make changes.
- At the same time, don’t be so harsh on yourself that you never complete anything.
- Each mistake is a lesson that brings you one step closer to knowing how to draw a dog realistically.
Gallery Showings and Online Portfolios: Sharing Your Work
Once you’ve finished your drawing, it’s time to show it off. Whether you’re looking to go professional or just want to share your work with friends and family, showcasing your art is the final step.
- Consider creating an online portfolio. Websites like Behance or ArtStation allow you to display your work professionally.
- Social media platforms like Instagram are also excellent for sharing artwork and connecting with a community of like-minded people.
- If you’re serious about art, consider participating in gallery shows or art fairs. It could be a local community event or something more significant.
- Getting your art out there not only brings recognition but also opens doors for constructive criticism and growth.
- Remember, the goal is not just to get ‘likes’ or sell your work, but to engage with a community and grow as an artist.
Additional Considerations: The Nuanced Art of Drawing a Dog Realistically
When we dive into the world of realistic dog drawing, it’s not just about the lines, the shades, or even the fine details. It’s about the convergence of technical skills with emotional understanding, and the exploration of an art form that’s as challenging as it is rewarding. Below are some nuanced considerations that can truly elevate your quest in learning how to draw a dog realistically.
Subject Selection: It Starts with a Dog
While it might seem obvious, the choice of your canine subject can significantly influence your artwork. Different breeds bring different challenges and opportunities. A Dalmatian, with its unique spots, can provide a lesson in balance and spacing, while a Siberian Husky could give you a deep dive into capturing the nuances of fur texture and eye color.
- The dog’s age can also be an interesting consideration. Puppies have softer features and often give a sense of playfulness and curiosity, which can be fascinating to capture.
- If possible, spend some time with your subject. Getting to know the dog’s personality can help in adding those subtle touches that make the drawing truly lifelike.
Composition: Framing Your Masterpiece
How the dog fits within the boundaries of your canvas or paper is another crucial aspect. Is the dog going to fill the entire space, or is it part of a larger scene?
- The positioning of your subject can help convey emotion. A centered subject can give a sense of balance, while placing the dog towards the edges can create tension or anticipation.
- Think about what you want to highlight. Is it just the face, the full body, or maybe the dog in action?
- Your composition sets the stage for everything that follows, so spend a good amount of time planning this out.
Color Choices: Beyond Black and White
If you’re moving beyond pencil or ink and diving into color, then understanding the color wheel and the emotions that colors can evoke is invaluable.
- Browns and warm tones can give a sense of coziness and home.
- Cool colors like blue or grey might evoke a sense of calm or melancholy.
- If you’re replicating the exact colors of a specific dog, pay close attention to any gradients or changes in hue. Even within one color, you might find an array of shades that require careful mixing and application.
Patience and Practice: The Not-So-Secret Ingredients
Many budding artists underestimate the amount of time it takes to draw realistically. Even if you have natural talent, honing it into skill takes consistent practice.
- It might take hours just to get the eyes or fur right. That’s okay! Each minute spent is a step forward in your artistic journey.
- Practicing regularly helps build muscle memory, making the more complex aspects of drawing become second nature over time.
Self-Care for Artists: Mind and Body Harmony
Drawing, especially detailed work like realistic dog portraits, can be taxing both mentally and physically. Prolonged periods of concentration can strain your eyes, and the physical act of drawing can be hard on your hands and back.
- Take regular breaks, do some light stretches, and rest your eyes.
- Consider ergonomic chairs and tables to give you a comfortable drawing posture.
Each of these considerations brings its own set of challenges and rewards, weaving a rich tapestry of experiences and learnings. They help build not just your portfolio, but also your understanding of what it means to be an artist. As you keep these considerations in mind, you’ll find that learning how to draw a dog realistically is a fulfilling journey that stretches far beyond the tip of your pencil.
Frequently Asked Questions: Unlocking the Mysteries of Drawing a Dog Realistically
When it comes to mastering the art of how to draw a dog realistically, questions abound. From selecting the right materials to capturing the spirit of your furry muse, there’s a lot to think about. Here’s a comprehensive FAQ section designed to tackle those burning queries and make your artistic journey smoother.
What Type of Pencil Works Best for Realistic Drawings?
The type of pencil you choose can greatly impact the outcome of your drawing. For highly detailed work like realistic dog portraits, many artists prefer using graphite pencils ranging from 2H for light lines to 8B for deep, dark shading.
- If you’re a beginner, consider starting with a standard HB or 2B pencil, and then experiment from there.
- Mechanical pencils can offer precision but might not provide the range of shading that traditional pencils do.
What Paper Should I Use?
The paper you select can be just as crucial as your choice of pencil. Heavyweight paper, like watercolor paper or bristol board, can handle more shading and erasing without getting worn out.
- If you’re planning to add color, make sure the paper is compatible with the medium you choose, be it colored pencils, watercolors, or markers.
- Test your chosen pencils on a scrap piece of your selected paper to see how well they blend and shade.
How Do I Make the Fur Look Realistic?
Capturing the texture of a dog’s fur is one of the most challenging yet rewarding aspects of the drawing process.
- To draw realistic fur, observe the direction in which it grows and the pattern it follows. Short strokes generally work well.
- Layer different shades and grades of pencil to add depth and volume.
- For darker fur, start with lighter strokes and build up to the depth you need. For lighter fur, use the negative space to your advantage.
Can I Use Photographs as Reference Material?
Yes, photographs can be a great aid, especially for capturing details and complex poses. However, remember to respect copyright laws and either use your own photos or find royalty-free options.
- A photograph can be a useful reference, but try not to rely on it entirely. Incorporating your own observations and interpretations brings life to the drawing.
How Do I Draw a Dog’s Eyes Realistically?
The eyes are often said to be the windows to the soul, and this holds true for dogs as well.
- Study the anatomy of a dog’s eye. Notice how the iris is large and often takes up a significant portion of the eye.
- Observe the light reflections and include them in your drawing. These tiny details can make the eyes look moist and realistic.
- The shape and size of the eyes can vary greatly depending on the breed, so make sure to take that into account.
Do I Need to Know Dog Anatomy?
Understanding basic canine anatomy can give you a significant edge. Knowing where the muscle and bones are most prominent can guide your shading and line work.
- A simple skeletal study can help you get the proportions right.
- Observe how the skin folds, where the fur is dense, and how the tail aligns with the body. These anatomical insights will enrich your drawings.
Is it Necessary to Add a Background?
While your primary focus might be the dog, sometimes adding a simple background can give context to your drawing.
- If you’re new to backgrounds, start with something simple like a horizon line or a patch of grass.
- Make sure the background complements the subject instead of competing with it.
How Long Will It Take to Become Proficient?
The time it takes to become proficient in drawing realistic dogs can vary greatly from person to person. It’s a skill that requires ongoing practice, patience, and dedication.
- The more you draw, the quicker you’ll improve. Setting aside regular time for practice can speed up your progress.
- Consider taking professional courses or workshops to elevate your skills faster.
Summary: Reflecting on the Journey of Learning How to Draw a Dog Realistically
If you’ve made it this far, congratulations! You’ve immersed yourself in the detailed, fascinating, and sometimes challenging universe of drawing a dog realistically. From the nuances of choosing the perfect subject to mastering the art of fur texture, the journey has been nothing short of enlightening. Let’s take a moment to wrap up the key takeaways from this deep dive.
The Significance of Subject Choice
Choosing your canine subject thoughtfully can influence the outcome of your art dramatically. As we’ve seen, the breed and age of the dog present unique challenges and opportunities for artistic expression. Whether you opt for a playful Labrador puppy or a dignified elder German Shepherd, the subject you choose becomes the cornerstone of your artwork.
The Importance of Composition and Framing
The way you position your dog within your canvas or sketchpad sets the tone for the entire piece. Are you aiming for an action shot or a soulful portrait? Your composition choices should reflect your ultimate vision and purpose. Composition serves as the roadmap for your viewer’s eyes, guiding them across your masterpiece.
The Power of Color and Detail
When it comes to drawing a dog realistically, the devil is indeed in the details. The colors you choose, the shades you employ, and the small intricacies like the gleam in the eyes or the fluffiness of the fur contribute to the lifelike quality of the piece. For those who venture into the realm of color, mastering the color wheel and understanding the emotional tones that different hues carry can add an extra layer of depth to your work.
The Imperative of Practice and Patience
No one becomes a master overnight. Drawing, especially with a focus on realism, requires dedicated practice, plenty of patience, and a willingness to make (and learn from) mistakes. Regular practice not only sharpens your skills but also helps in building muscle memory that aids in more complicated tasks like fur texturing and shading.
The Lasting Impact of Self-Care
Let’s not forget that artistic pursuits, while rewarding, can be physically and mentally taxing. Ergonomic comfort and frequent breaks aren’t mere luxuries; they’re necessities for sustainable artistic practice. Prioritizing your well-being ensures that you can continue to create stunning, realistic dog drawings for years to come.
This journey of learning how to draw a dog realistically isn’t just about mastering a skill. It’s about embracing an art form that can offer endless fulfillment, both as a creative outlet and as a conduit for emotional expression. So keep those pencils sharp, your eyes keen, and your spirit willing, because the path ahead is filled with boundless opportunities for growth, discovery, and artistic triumph.