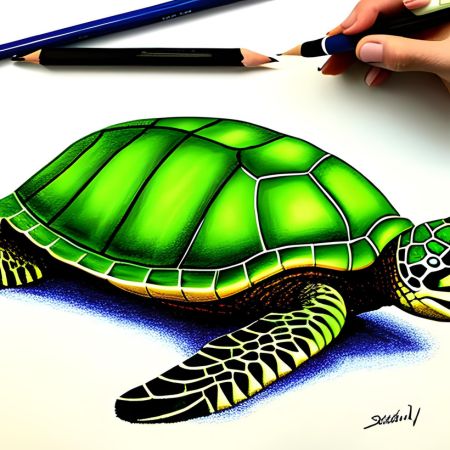
How to Draw a Turtle: A Fun and Simple Guide. If you’re like me, you find joy in expressing yourself through the tip of a pencil or a stroke of a brush. One creature that has always caught my fascination is the turtle. Their intricate designs, sturdy form, and serene nature make them such a popular choice for many. Whether you’re aiming for a quick doodle or a detailed masterpiece, I’m here to guide you every step of the way. So, roll up your sleeves, grab that sketchbook, and let’s embark on this artsy journey together!
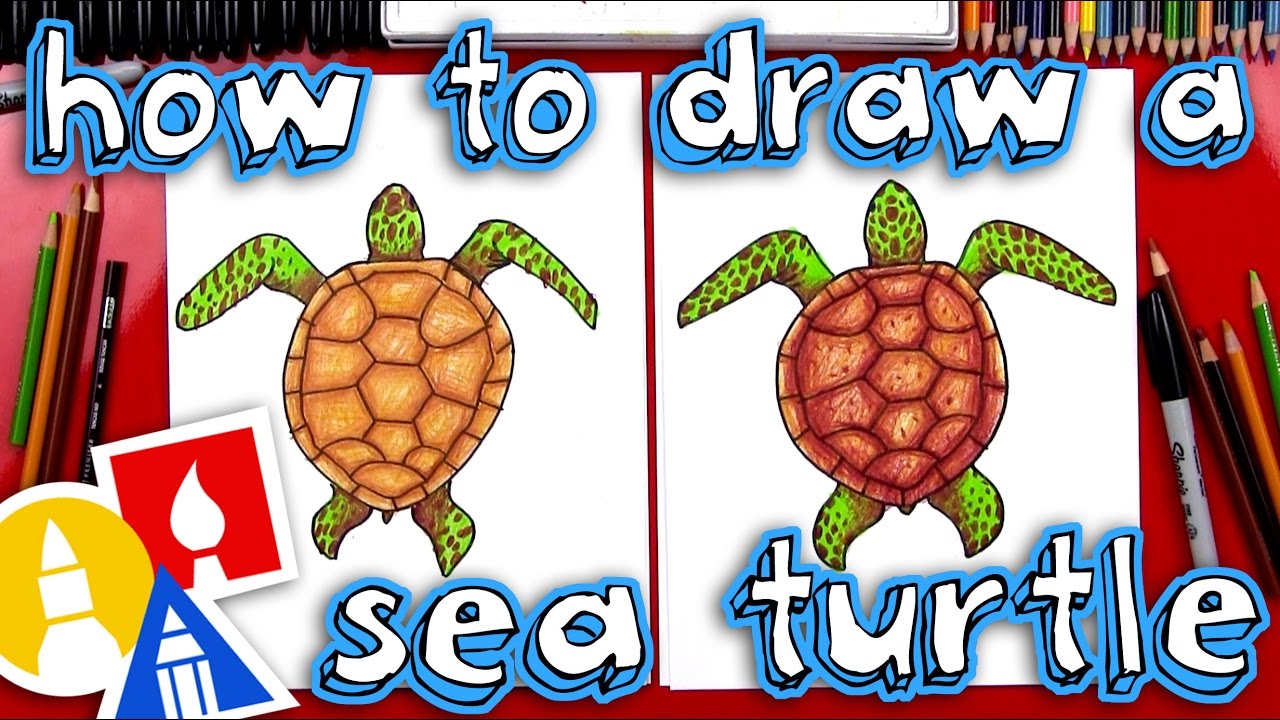
How to Draw a Turtle Easy
I get it, sometimes we just want to draw something without spending hours on it. Drawing a turtle can be as straightforward as you’d like it to be. Here’s a neat method for all of you out there looking for a quick, yet adorable turtle sketch:
- Start with the Shell: Imagine an egg lying on its side. Now, draw it! This egg-like oval serves as the base for our turtle’s shell.
- Sketch the Head: Ever seen a turtle poke its head out? Picture a smaller, rounded shape just ahead of the shell. There’s our turtle’s cute little face!
- Add the Legs: Imagine droplets of water falling – that teardrop shape is what we’re aiming for. Draw four of these for the turtle’s legs, placing two on each side of the shell.
- Don’t Forget the Tail: Behind the back legs, imagine a tiny piece of triangle pointing outwards. It’s a small detail, but oh so crucial!
- Add Facial Features: For that adorable look, pop in two little dots for eyes and sketch a cheerful curved line for the mouth.
And look at that, you did it! You’ve just drawn a delightful turtle without breaking a sweat.
Creating a Comfortable Setting: Before we get into drawing, find a cozy spot with good lighting. Lay out your sketchbook and pencils, and maybe play some calming music in the background. Setting the mood can make the drawing process more enjoyable.
Start with the Shell:
- Shape: Begin with a slightly flattened oval, similar to the shape of an egg lying on its side.
- Size: If you want your turtle to look younger or more cartoonish, make this oval a bit more rounded. For a more mature turtle, elongate the oval a tad more.
Sketch the Head:
- Placement: Position a smaller, rounded shape just ahead of the shell. This will be our turtle’s head.
- Expression: If you’d like, tilt the head slightly upwards, as if the turtle is curiously exploring its surroundings.
Add the Legs:
- Front Legs: Imagine droplets of water – this teardrop shape is perfect for the front legs. Place them so they appear to be reaching forward, giving our turtle a sense of movement.
- Back Legs: Draw the rear legs a bit shorter and thicker than the front ones. This gives our turtle a sturdy foundation.
Tail Time:
- Position and Shape: Think of a mini kite’s tail! Draw this right behind the back legs. It might seem like a small detail, but it adds a lot to our turtle’s silhouette.
Facial Features Bring Life:
- Eyes: Add two dots for eyes. For a more playful feel, place them slightly apart. If you want your turtle to look surprised, place them higher up on the head.
- Mouth: A simple curved line does the trick. Turn it upwards for a cheerful turtle or straighten it for a more neutral expression.
- Personality Touch: How about adding a couple of eyebrow-like curves above the eyes? This can give our turtle a surprised or thoughtful look!
Flair & Fun:
- Patterns: Even in a simple drawing, you can add small patterns or dots on the shell to give it character. Remember, it doesn’t have to be perfect; it’s your unique creation!
- Environment: Fancy giving your turtle a setting? A few wavy lines below can represent water, or maybe a sun in the corner to indicate a sunny day.
And there you have it! Your own unique, simple, yet vibrant turtle drawing. Remember, art is all about expressing yourself. So, each time you draw, you’re imprinting a piece of yourself onto that paper. Let your creativity flow and enjoy every moment of it!
How to Draw a Turtle Step by Step
If you’ve got a bit more time on your hands and are yearning for more detail, let’s dive a tad deeper:
- Begin with the Outline: Starting feels familiar, right? Just like the easy method, go with the slightly flattened oval for the shell and a rounder shape for the head.
- Refine the Legs: Our turtle deserves some stylish limbs. Instead of basic ovals, why not shape the front legs like graceful flippers? Imagine them as elongated, thin leaves, curving gracefully. The back ones can be shorter, giving our turtle a balanced look.
- Facial Detailing: Ah, the face, the window to the turtle’s soul! Draw two circles for the eyes. Inside those, a tinier circle for pupils will give it that lifelike touch. A friendly curved line for the mouth and a couple of nostril dots, and you’re golden.
- Texture the Shell: Now, imagine a turtle’s shell as a piece of art. Start by adding a central line, then extend curved lines from there. Think of it like sunrays, giving your turtle’s shell those distinct segments.
- Final Touches: Now, for my favorite part! Add a touch of nature with webbing lines on the flippers. And if you’re feeling extra artsy, sprinkle in some scale details on the legs and head.
Set the Scene: Before diving into the actual drawing, get comfortable. A good posture, relaxed setting, and the right materials are essential. Perhaps, grab a soft pencil for sketching and a harder one for final outlines.
Start with the Basic Shapes:
- Shell’s Outline: Begin with a slightly flattened oval, similar to a pebble you might skip on water. This shape sets the stage for the turtle’s body.
- Head: Adjacent to the shell, sketch a circle for the head. This circle should be slightly smaller than half the size of the shell.
Add More Details:
- Legs:
- Front Legs: For a more realistic touch, shape the front legs like elongated flippers. They should curve gently, resembling stretched teardrops.
- Back Legs: These are shorter and more rounded. Think of a semi-circle or a half-moon shape. They’re stout and provide balance to our turtle.
- Tail: Draw a slim, pointed tail extending from the back. It doesn’t need to be long; just a small extension to give our turtle completeness.
Facial Details:
- Eyes: Instead of simple dots, let’s go for more detailed eyes. Sketch two oval shapes, then add smaller circles inside for pupils. If you want your turtle to appear more expressive, slightly angle the eyes.
- Mouth: A gentle curved line, almost like a soft smile, is perfect. For an extra touch of realism, add a tiny split at the end of the curve.
- Nostrils: Two small ovals or dots above the mouth help our turtle breathe!
Dive into the Shell:
- Central Design: Imagine a tree’s growth rings. Begin with a semi-circle at the top center of the shell. From there, draw concentric curves expanding outwards, each one a bit longer than the previous.
- Segmentation: Add lines from the top center of the shell radiating outwards. This creates the natural segmented look of the turtle’s shell, giving it texture and depth.
Finishing Touches:
- Texture: Add some life to your drawing! Lightly sketch some scale patterns on the legs and neck. Remember, scales aren’t always perfectly uniform; they can vary in size and shape.
- Environment: If you’re feeling adventurous, sketch in some surroundings. Maybe some seaweed if it’s an aquatic turtle or some rocks and sand for a terrestrial one.
Erase and Refine: This is where your drawing truly comes to life. Lightly erase any unnecessary guide lines. Go over your drawing with a harder pencil or even an ink pen to finalize your turtle’s outline.
Shading: If you’re feeling ambitious, adding some shading can give your turtle a three-dimensional look. Observe where the light might hit and shade the opposite sides to give depth.
Bonus Tip: Turtles, like humans, have unique personalities. Think about what character you want your turtle to express. Is it a wise, old turtle or a bubbly, young one? This can guide some of your artistic choices.
And there we are! You’ve journeyed through the detailed process of drawing a turtle step by step. As with any art form, practice and patience are key. Each time you draw, you’ll find your strokes becoming more confident, and your turtles taking on more life. Keep sketching, keep exploring, and above all, enjoy the artistic journey!
How to Draw a Turtle Shell
Alright, so you’re like me and find a turtle’s shell simply mesmerizing? I mean, it tells tales of its journeys and adventures. Let’s give that shell the love it deserves:
- Start with the Base: Begin with that familiar flattened oval. I promise this is the last time we’re drawing it!
- Central Ridge: Imagine a spine for the shell. A soft, curved line running down its center is what we’re after.
- Segmentation: It’s pattern time! Draw lines from this central ridge that bend outward, creating those iconic turtle shell segments.
- Detailing: The devil’s in the details, right? Add character with tiny dots, lines, and even subtle cracks. You’re capturing the turtle’s essence here.
- Outer Rim: Finally, picture a thin border framing a portrait. Drawing a slightly jagged line around the oval gives that shell some beautiful depth.
Understanding the Shell’s Basics: A turtle’s shell is a fusion of its spine and ribcage, making it an integral part of its skeleton. It’s not just an accessory; it’s a lifeline. The top dome-like part is called the carapace, and the flat bottom part is the plastron. For this guide, we’ll focus mainly on the carapace, the most commonly illustrated part.
Begin with a Solid Base:
- Shape and Proportions: The shell’s shape is usually an elongated oval or a rounded rectangle, slightly flattened at the bottom. But remember, turtles come in different sizes and shapes, so don’t fret about getting it perfect. It’s the overall feel and detailing that counts.
Mapping Out the Shell’s Segments:
- Central Ridge: Down the center of the oval, sketch a straight or slightly wavy line. This central ridge will guide the placement of the larger segments or ‘scutes’ of the shell.
- Segmentation: Draw slightly curved lines starting from the central ridge and reaching out to the shell’s edges. Typically, you’d find five of these larger segments, but artistic liberty can come into play here.
Detailing Each Scute:
- Patterns: Each segment or scute on a turtle’s shell often has intricate patterns. These can be spirals, starbursts, or even more random textures. Depending on the species of turtle you’re drawing, these patterns can vary. Sketching these in can be therapeutic and adds depth to your drawing.
- Age Rings: Turtles, like trees, have growth rings on their shells. These can be illustrated by drawing a few concentric curves within each scute, giving the shell an aged look.
Defining the Outer Edge:
- The Rim: One defining feature of many turtle shells is the slightly raised rim or edge. To represent this, draw another line around your initial oval, following its shape but making it irregular with slight bumps and curves. This edge often houses smaller, rectangular scutes.
- Peripheral Scutes: Along the outer rim, between the larger central segments and the very edge of the shell, are smaller segments called peripheral scutes. Usually, they appear as elongated rectangles or squares. You can sketch these in for added detail.
Adding Depth and Texture:
- Shading: Use light and shade to give the shell a 3D appearance. Shading the parts of the shell between the scutes, especially near the edges, will make the segments stand out and provide depth.
- Weathering and Texture: A turtle’s life is filled with adventures, and the shell often bears the marks. Add tiny cracks, dents, or spots to give the shell a lived-in and natural look.
Bonus Inspiration: Turtle shells have often been used in tribal art, mythology, and even fashion. You can draw inspiration from various cultures and incorporate those designs. Whether you go for tribal patterns, geometric designs, or more free-form textures, the shell is your canvas!
In essence, the turtle shell tells a story of the creature’s life and experiences. As you sketch and detail, let your imagination roam. Feel the turtle’s slow-paced journey through its intricate shell, and capture not just its appearance, but its essence.
The Rich History Behind Turtles
Turtles have always been mesmerizing creatures, not just for their unique appearance but for the lore that surrounds them. They’ve been with us for over 200 million years, with fossil records placing their ancestors during the time of the dinosaurs. In various cultures, turtles symbolize longevity, endurance, and patience. For the Native Americans, they believed the world was on the back of a giant turtle, coining the term “Turtle Island” to describe North America. Meanwhile, in Eastern traditions, turtles often represent wisdom and knowledge. By understanding their historical significance, drawing a turtle becomes more than just sketching an animal; it’s capturing a piece of history.
Embracing the Calm: The Turtle’s Pace in a Fast World
In a world that constantly demands us to move faster and achieve more, the turtle is a beautiful reminder of the power of stillness and perseverance. Their calm demeanor and steady pace serve as metaphors for approaching life with resilience and patience. By drawing a turtle, artists often find themselves reflecting on their own pace in life. It’s an artistic meditation of sorts, urging us to ask ourselves if we’re racing too fast or if, like the turtle, we’re embracing each moment, however slow it might seem.
The Habitat and Surroundings: Setting the Scene for Your Turtle
While the turtle itself is a magnificent subject, understanding and drawing its habitat can elevate your artwork. Whether it’s the sandy beaches where sea turtles lay their eggs, the freshwater ponds where you’d find terrapins, or the vast oceans that are home to the leatherbacks, each environment tells a story. Including elements like glistening water, aquatic plants, or even footprints in the sand can set the mood. It provides context, making your drawing a window into the turtle’s world.
Tips for Drawing Turtles in Motion
Though we often think of turtles as slow and steady, they can be surprisingly agile, especially in water. Capturing a turtle in motion, whether it’s a sea turtle gliding gracefully through the ocean or a tortoise stretching its neck to reach a leaf, can add dynamism to your artwork. To convey motion, focus on the positioning of the flippers or legs. Slight curves or angles can hint at movement. The surrounding water ripples or the trail in the sand can further emphasize their journey. It’s all about illustrating the subtle nuances of their movement, letting the viewer feel the momentum.
Variations and Species: The Diverse World of Turtles
There’s a beautiful variety in the turtle world. From the ginormous leatherback sea turtles, which can weigh up to 2,000 pounds, to the tiny bog turtles, every species has its own charm. The radiant colors of the painted turtle, the distinctive diamond-patterned shell of the diamondback terrapin, and the elongated snout of the soft-shelled turtle – each offers a distinct drawing challenge. By studying and drawing various species, you not only enhance your skills but also pay homage to the rich biodiversity of our planet.
Turtles and Mythology: Tales from Around the World
Delving into the myths and legends surrounding turtles, it’s easy to see the reverence various cultures have for these creatures. In Hindu lore, the world rests on the back of a cosmic turtle. Meanwhile, ancient Chinese tales speak of turtles as predictors of the future, using their shells in divination practices. These legends not only highlight the turtle’s significance in ancient times but also inspire contemporary artists to imbue their drawings with elements of these age-old stories, bridging the gap between past and present.
Anatomy and Structure: Beyond the Shell
A turtle is more than just its shell. By understanding its anatomy, artists can achieve a deeper appreciation and accuracy in their drawings. From its beady eyes that have witnessed decades, if not centuries, of change, to the unique patterns on its skin and the delicate curve of its beak, focusing on the minutiae can bring your turtle to life. As you sketch, imagine the stories each wrinkle and spot might tell, adding a layer of depth and history to your work.
The Threats Turtles Face: Art with a Message
Unfortunately, in our modern world, turtles face numerous threats, from habitat loss to plastic pollution. Sea turtles, for instance, often mistake plastic bags for jellyfish, their favorite snack. By illustrating these realities, artists can raise awareness and advocate for the conservation of these ancient mariners. Your drawings can be more than just a portrayal; they can be a call to action, prompting viewers to reflect on their impact on the environment.
Capturing Emotion: The Soulful Gaze of a Turtle
Have you ever locked eyes with a turtle? There’s an undeniable depth, a wisdom that seems to peer back. Capturing that emotion, that ancient knowing, can be the difference between a good drawing and a great one. Consider the mood you want to convey. Is it a playful hatchling making its first trek to the sea, or an old soul sunning itself after years of adventures? Let that emotion guide your hand.
Turtles in Pop Culture: Modern Interpretations
From beloved cartoon characters like the Teenage Mutant Ninja Turtles to memorable movie characters like Crush from ‘Finding Nemo,’ turtles have left their mark in pop culture. Drawing these iconic turtles can be a delightful blend of nostalgia and creativity. It’s a chance to reimagine familiar faces or to add your own twist to classic characters.
Color and Texture: Bringing Vibrancy to Your Turtle
While many might initially think of turtles as muted in color, many species boast vibrant patterns and hues. The painted turtle, for instance, showcases a riot of reds, yellows, and greens. When adding color to your drawing, consider the turtle’s natural habitat and how light might play on its shell and skin, adding highlights and shadows for a more three-dimensional feel.
The Gentle Giants: Spotlight on the Leatherback
The leatherback turtle, the largest of all sea turtles, is a marvel of nature. With its leathery shell and powerful flippers, drawing the leatherback is a study in contrasts – strength and gentleness combined. Try capturing the majesty of this ocean wanderer, perhaps juxtaposing it against other marine life to emphasize its grand size.
Turtles in Motion: Dynamic Poses
While the serene, stationary turtle has its charm, there’s an unmatched beauty in capturing them in motion. Whether it’s the determined crawl of a hatchling towards the sea or the elegant glide of a turtle underwater, these dynamic poses challenge an artist to consider fluidity and grace in their strokes.
Turtle Hatchlings: The Journey to the Sea
One of the most poignant moments in a turtle’s life is the perilous journey hatchlings make from their sandy nests to the vast ocean. These tiny creatures, driven by instinct, face numerous challenges, from predators to man-made obstacles. Drawing this moment is both heartwarming and heart-wrenching, a tribute to the resilience of life.
Reflecting on the Process: Growth Through Art
Drawing turtles, or any subject for that matter, is more than just a hobby. It’s a journey of self-growth and reflection. With each line, shade, and detail, artists not only get closer to capturing the essence of their subject but also embark on a journey of self-discovery. Embrace the process, celebrate the imperfections, and most importantly, enjoy every moment.
Incorporating Background Elements: Setting the Scene
Turtles, as marvelous as they are, often share their habitat with a myriad of other species and elements. Incorporating these into your drawings can transport your viewers straight into the heart of a turtle’s home:
- Seaweed and Corals: These underwater plants and organisms can add depth and color to your aquatic scenes.
- Rocks and Boulders: Whether sunbathing on them or navigating around them, turtles often interact with these elements.
- Fish and Marine Life: Think of small fishes darting around or a curious octopus in the background.
- Sand Patterns: Especially for beach scenes, the patterns of the sand and the trail left by a moving turtle can be a captivating detail.
- Sunlight and Shadows: How the light filters through water or dances on the turtle’s shell can significantly impact the mood of your drawing.
Sketching vs. Detailed Rendering
Every artist has their own unique style, and turtles can be captured in various artistic renditions:
- Quick Sketches: These are great for capturing the essence of the moment, especially if you’re observing a live turtle.
- Detailed Renderings: This method involves spending more time on each aspect, perfecting every scale, and shade.
- Abstract Interpretations: Perhaps you want to capture the spirit of a turtle rather than its exact appearance.
- Silhouettes and Shadows: This is a unique way to represent turtles, focusing on shape and form over details.
- Combining Styles: Mixing and matching styles can produce unique and intriguing results, like a detailed turtle with an abstract background.
Turtle Personalities: Every Turtle Has a Tale
Just like humans, turtles have personalities. Observing their behaviors can give you insights into their individual characters:
- Curious Explorers: Some turtles might approach a new object (or even a human diver!) with curiosity.
- Shy Dwellers: Others might prefer to hide or shy away, tucking into their shell at the slightest disturbance.
- Playful Swimmers: Especially younger turtles can often be seen playing around, chasing each other, or even playing with drifting seaweed.
- Wise Observers: Older turtles tend to be more reserved, observing the world around them with a calm demeanor.
- Sun-Lovers: Many turtles, especially tortoises, can be seen basking for hours, soaking in the warmth.
Using Different Mediums: Beyond Pencils
Art has no boundaries, and neither should your turtle drawings. Exploring different mediums can open up a plethora of possibilities:
- Watercolors: The fluidity of watercolors can perfectly capture the aquatic ambiance of underwater scenes.
- Charcoal: This can bring out the rich contrasts, especially for detailed shell patterns or silhouettes.
- Digital Art: Modern tools allow for a wide range of techniques, from digital painting to 3D rendering.
- Collage: Using cut-out pieces from magazines or colored papers can create a unique textured turtle.
- Mixed Media: Combine various mediums for a rich, layered effect.
From 2D to 3D: Sculpting Turtles
Drawing doesn’t have to be limited to paper. Taking your turtle art into the third dimension can be a fulfilling experience:
- Clay Sculpting: Mold and shape a turtle from clay, adding textures and details.
- Papercraft: Fold and craft paper into intricate turtle shapes.
- Wood Carving: For those adept at it, carving a turtle out of wood can be both challenging and rewarding.
- Textile Art: Sew or knit turtle designs into fabric or even make turtle plush toys.
- Recycled Materials: Use old plastics or metals to craft a turtle, perhaps as a statement on pollution.
The Global Turtle: Varieties Around the World
Turtles can be found in nearly every corner of the world. Drawing species from different regions can be enlightening:
- African Spurred Tortoise: Native to the Sahara desert, they have a distinctive rough shell.
- Australian Snake-Necked Turtle: As the name suggests, they possess a long, snake-like neck.
- Red-Eared Slider: Popular in the pet trade, they’re native to the US and have a distinctive red stripe behind their eyes.
- Aldabra Giant Tortoise: Found in the Seychelles, they are one of the largest tortoises in the world.
- Alligator Snapping Turtle: Native to the US, they have a beak-like jaw and a rugged appearance.
Turtles Through the Ages: From Hatchling to Elder
A turtle’s life journey is a tale of survival, growth, and transformation. Drawing turtles at various life stages can be a study in adaptability and change:
- Hatchlings: Tiny, delicate, and vulnerable, their journey to the sea is one of nature’s most poignant moments.
- Juveniles: Energetic and curious, they’re often seen exploring their surroundings.
- Adults: Mature and often larger, they’re in their prime with fully developed features.
- Elders: Bearing the marks and scars of time, they exude wisdom and grace.
- Nesting Females: Capturing the moment when they come ashore to lay eggs can be a touching scene.
Incorporating Movement: The Dance of the Turtle
Though they may seem slow, turtles exhibit a range of motions that can be enchanting to capture:
- Swimming: Sea turtles glide through the water with a grace that belies their size.
- Crawling: The slow, determined crawl of a tortoise can evoke feelings of perseverance.
- Digging: Turtles digging nests or burrowing can show a side of determination and care.
- Stretching: Whether it’s reaching out for a bite or merely sunbathing, turtles often stretch out their limbs and neck.
- Playing: Capturing moments of play, especially between young turtles, can be heartwarming.
Turtles and Their Environments: Context Matters
The backdrop against which you place your turtle can set the entire mood of your artwork:
- Tropical Beaches: Imagine a turtle on a sunlit beach with palm trees swaying in the background.
- Coral Reefs: Colorful corals and marine life can create a vibrant aquatic scene.
- Deserts: Think of tortoises navigating the vast, sandy landscapes with cacti and desert plants.
- Muddy Ponds: Freshwater turtles peeping out from murky waters can be a charming sight.
- Urban Settings: Depicting turtles in city parks or urban ponds can be a juxtaposition of nature and modernity.
The Spirit of the Turtle: Symbolism and Meaning
Throughout cultures, turtles symbolize various attributes. Drawing with these symbols in mind can add depth to your art:
- Longevity: Turtles, with their long lifespans, are often seen as symbols of life, endurance, and persistence.
- Protection: Their shells act as natural armor, symbolizing protection and safety.
- Stability: Being slow-moving, turtles are associated with stability, patience, and grounding.
- Wisdom: Their ancient lineage and demeanor make them symbols of wisdom and knowledge.
- Creation Myths: Many cultures see turtles as world-bearers or creatures involved in world creation.
Drawing turtles, with their rich history, diverse species, and deep symbolism, is more than an artistic endeavor; it’s a journey of discovery and connection with nature. Every sketch and artwork you create can be a tribute to these marvelous creatures and the world they inhabit.
Tips and Tricks for Perfecting Your Turtle Artistry
Drawing turtles can be both a rewarding and therapeutic experience, especially when you nail those tiny details that make your art come alive. Over time, artists have discovered some secrets that can elevate a simple turtle sketch into a masterpiece. If you’re on the journey to perfecting your turtle renditions, here are some tips and tricks that might just make all the difference:
- Observe Real Turtles: Before you dive into drawing, spend some time observing turtles in their natural habitat, or even at a local aquarium or zoo. Watching their movements, understanding the textures of their shells, and noticing the play of light on their bodies can give you invaluable insights.
- Use Reference Photos: Having a reference photo can guide your drawing process. It provides you with a realistic template, helping to ensure proportions and details are accurate. Plus, it’s always easier to draw when you have a visual to refer to.
- Experiment with Lighting: The way light hits a turtle’s shell can dramatically change its appearance. Play around with different lighting scenarios in your sketches, from the dappled light of a sunlit pond to the soft glow of an underwater scene.
- Master the Art of Shading: Shading can add depth and dimension to your turtle drawing. Remember, the shell isn’t flat; it’s domed. Proper shading can make it pop off the page.
- Texture is Key: The difference between a flat-looking turtle and a lifelike one often lies in the texture. Practice creating different textures to replicate the look of scutes on the shell or the rough, scaled skin on their legs.
- Don’t Forget the Environment: The surroundings can give context to your turtle. It tells a story. Whether it’s an underwater scene, a sunny beach, or a muddy pond, make sure to add elements that bring out the turtle’s natural habitat.
- Go Beyond the Norm: Think about drawing not just the outside, but maybe a cross-section of a turtle, showcasing its anatomy. It can be a fun and educational twist!
- Practice Makes Perfect: Like with any art form, the more you draw, the better you get. Regularly sketching turtles will help you get more familiar with their form and nuances.
- Stay Updated with Art Communities: Join online forums or social media groups dedicated to art. Sharing your work and getting feedback can be immensely helpful. Plus, seeing others’ interpretations of turtles can be inspiring!
- Stay Curious and Have Fun: Remember, art is an expression of your unique perspective. Stay curious, experiment with different styles, and most importantly, enjoy the process. Your passion will shine through in your artwork, captivating anyone who sees it.
Drawing a turtle is like capturing a piece of nature’s tranquility. And with these tips and tricks up your sleeve, every stroke you make can bring you closer to creating a turtle masterpiece that resonates with viewers.
Considerations When Drawing Turtles
Drawing a turtle might seem straightforward, but the beauty is often in the details. As with all artistic endeavors, considering the deeper nuances can elevate your work from good to exceptional. Before you dive into the world of turtle artistry, here are some considerations to mull over that can enrich your drawing experience:
- Species Variations: All turtles are not created equal. From the tiny terrapins to the majestic leatherbacks, each species has its own distinct characteristics. Consider which species you’re aiming to represent and research its features diligently. The flippers of a sea turtle, for instance, differ greatly from the clawed feet of a tortoise.
- Age and Life Stages: A hatchling has a softer, more delicate shell compared to the rugged, worn shell of an older turtle. Decide on the age of your turtle subject. Remember, depicting life stages can also tell compelling stories, from the vulnerability of a newborn to the wisdom exuded by older turtles.
- Mood and Atmosphere: What feeling are you trying to convey with your turtle drawing? Is it the serene stillness of a turtle basking in the sun? Or perhaps the dynamic energy of a hatchling racing to the sea? Your choice can set the entire tone for your artwork.
- Color Choices: While you might start with simple sketches, incorporating color can add depth and vibrancy to your drawings. Think about the natural colors of the turtle but don’t be afraid to experiment. Soft pastels can evoke a dreamy feel, while bold, vibrant hues can make your turtle pop.
- Natural Behavior: Turtles have a range of behaviors, from nesting to feeding to interacting with their environment. Capture a unique moment or behavior to give viewers a glimpse into the turtle’s world.
- Anatomical Accuracy: While stylized drawings have their charm, if realism is your goal, understanding turtle anatomy is crucial. Consider investing time in studying the skeletal and muscular systems of turtles. This knowledge will guide your hand, especially when drawing detailed or dynamic poses.
- Environmental Interactions: The environment in which you place your turtle can add layers of depth to your narrative. Consider elements like water ripples, sandy textures, or the play of light through seaweed. How does the turtle interact with these elements?
- Cultural and Symbolic Ties: Turtles hold significant symbolic meanings across cultures, from creation tales to symbols of longevity. Weaving these cultural or symbolic elements into your art can provide an added layer of richness and intrigue.
- Personal Connection: Perhaps you have a personal memory or connection with turtles—a childhood pet or a memorable encounter during a beach holiday. Drawing from personal experiences can add authenticity and emotion to your work.
- Ethical Considerations: If using real turtles as models, always ensure they’re treated with respect and care. It’s essential to prioritize their well-being over getting the “perfect” reference shot.
In diving deep into these considerations, you don’t merely draw a turtle; you capture a moment, a feeling, a story. Such attention to detail and depth of thought can truly transform your work, making it resonate with viewers and leaving a lasting impact long after they’ve admired your piece.
Frequently Asked Questions (FAQ) About Drawing Turtles
Q: What type of pencil works best for drawing turtles?
A: While any pencil can get the job done, artists often recommend starting with a lighter grade pencil like an H or HB for the initial sketch. As you refine the drawing and add details, you can switch to darker grades, like B or 2B. For adding deep shadows or rich textures, pencils from the 4B-6B range can be invaluable.
Q: How do I capture the glossy texture of a turtle’s shell?
A: Capturing the gloss involves mastering the art of shading and highlighting. Observe where the light hits the shell—those areas should be left lighter or even white to give a “shine.” Contrasting these highlights with deeper shadows can create a realistic glossy effect.
Q: My turtle drawings always look flat. How can I give them more depth?
A: Depth can be achieved through perspective and shading. Instead of drawing a turtle from a straight-on view, try a 3/4 perspective or from a slightly elevated or lowered angle. Add shading to show the curvature of the shell and body, and use varying line weights to make certain parts pop.
Q: Can I use colored pencils or watercolors for my turtle artwork?
A: Absolutely! Colored pencils can provide precision and detail, especially for the intricate patterns on some turtle shells. Watercolors, on the other hand, are great for creating dreamy, soft backgrounds or capturing the turtle’s aquatic environment.
Q: How do I draw a turtle in motion, like swimming?
A: When drawing a turtle in motion, it’s essential to understand its anatomy and how it moves. Turtles have a unique, graceful way of swimming, using their front flippers almost like wings. Studying videos can help you capture the fluidity of their motion. Remember, the positioning of the legs and the curvature of the body can convey movement.
Q: I struggle with the turtle’s facial features. Any tips?
A: Turtles have quite simple yet expressive faces. Start with basic shapes: rounded triangles or circles for eyes and simple slits or curves for nostrils. Subtle curves can indicate the mouth. As always, using reference photos can help in getting the facial details just right.
Q: How do I depict the difference between a sea turtle and a tortoise?
A: The main differences lie in the body structure. Sea turtles have flatter, more streamlined shells and long flippers for swimming. Tortoises, on the other hand, have bulkier, dome-shaped shells and sturdy, clawed feet adapted for land.
Q: What’s the best way to practice drawing turtles?
A: Repetition and observation are key. Sketch regularly, draw from different angles, and use varied references. Over time, you’ll become more familiar with their form and will find it easier to capture their essence.
Q: Are there any digital tools or apps to help with drawing turtles?
A: Certainly! There are numerous drawing and illustration apps available, like Procreate, Adobe Illustrator, and Autodesk SketchBook. These often come with features like layers, varied brushes, and symmetry tools, which can aid in creating a detailed turtle illustration.
Q: Why do my turtle’s legs and flippers always seem out of proportion?
A: Proportion can be tricky. One way to ensure accuracy is to use guiding lines or grids. Break down the turtle’s body into simpler shapes—cylinders or ovals for legs, for example. As you refine, these shapes can be molded into more accurate representations of the legs or flippers.
Wrapping It All Up
Drawing a turtle, as we’ve journeyed through together, is so much more than just putting pencil to paper. It’s about capturing the essence of one of nature’s most serene and ancient creatures. It’s an invitation to slow down, observe, and appreciate the intricate details and vast wonders that these creatures represent.
While techniques and tips can guide your hand, it’s the passion and patience you bring to the canvas that will truly make your artwork come alive. Remember, every artist has their own unique perspective and style. As you continue exploring the world of turtle artistry, you’ll discover your own voice, your own story to tell.
And perhaps, in the quiet moments when your pencil moves across the page, you’ll feel a deeper connection not only to the turtle you’re portraying but also to the vast, intricate web of life they represent. Keep drawing, keep discovering, and most importantly, keep celebrating the slow and steady beauty of the world around us. Your artistic journey, much like a turtle’s voyage, is about cherishing each moment and finding joy in every stroke and sketch.